Showing posts with label Recipe - Dessert. Show all posts

Thursday, May 15, 2008

Tropical Tapioca

So first I was too busy to post and now I am just enjoying my temporary freedom from having a schedule too much to remember to post. Its not that I havent taken pictures, but I just dont quite make that next step of letting you all know about it. Well, I am making the effort now, and thats what you should care about.

I was in the mood for tapioca. Yes, this particular mood strikes every now and again, but seeing as I hadnt worked out in about two weeks I wasnt about to make the completely fattening (but oh-so-tasty) egg custard tapioca. I instead opted for large bead tapioca with coconut milk. I had it over some surprisingly wonderful tasting papaya which made for a healthy dessert.


I would not recommend serving this cold because the coconut milk tends to harden back up and feels pretty granular on the tongue. That being said, the papaya should also be at room temp (yeah I learned that one the hard way ::shudder::).

Tropical Tapioca

1/2 cup large bead tapioca
1 can full coconut milk
zest and juice of one key lime
1 papaya
salt to taste

Soak the tapioca in water over night.

Simmer the tapioca in the coconut milk until the pearls are clear.

Add the lime juice, zest, and salt.

Serve over fresh cut chunks of papaya, or other tropical fruits.

Sunday, May 11, 2008

Blueberry Shortcakes with Vanilla Pudding

A while back K invited me over to dinner along with the other students working in his lab. It was a celebration for a multitude of things: my completion of the Masters, V's success in her first year of grad school, and M's graduation from Purdue Undergraduate program. K made an awesome green curry and though most of us were pretty full after that we still managed to pack in the dessert I brought along.

I had intended it to be light and springy but the pudding turned out a little more dense than I had hoped (seems to be a common theme). It could probably have done with less cornstarch than the recipe called for. Nonetheless, it tasted wonderful and was gone in about 60 seconds.


Blueberry Shortcakes with Vanilla Pudding


Shortcakes:
2 1/4 c. flour
3 t. baking powder
1/2 t.salt
2 T. sugar
1 stick butter cubed
1 1/4 c. buttermilk
1 lemon of zest

Preheat the oven to 450.

Combine the dry ingredients.

Work in the cubed butter with your hands or a pastry blender until mealy. Add the zest.

Add the buttermilk and stir until just combined.

On a floured surface roll out the dough to the desired thickness and cut into circles. Brush the tops with some of the left over buttermilk and back for 12-15 minutes.

Vanilla Pudding:
1/3 c. sugar
1/4 c. cornstarch (Reduced from 1/3 c.)
2 large egg yolks
1/4 t. salt
3 c. low fat (1%) milk
1 vanilla bean
1 lemon of zest

Combine the sugar, salt, and egg yolks.

Whisk the cornstarch into the cold milk and slowly whisk that into the egg yolk mixture. Whisk until smooth.

Split a vanilla bean and add the seeds and the pod to the mixture. Add the lemon zest.

Cook over medium-high, whisking occasionally, until the first bubbles appear on surface.

Continue to cook, whisking constantly, for 1 minute more.

Pour pudding through a sieve into bowl in order to get rid of the solids.

Chill the pudding in a bowl for at least two hours. Put plastic wrap directly onto the pudding to keep a skin from forming.


Assembly:
Place the shortcake on a plate and top with the pudding.

Cover with the desired amount of blueberries.

Top with freshly whipped cream.

Sunday, May 4, 2008

Coconut Cake - Modified

I have been unimpressed of late. I use google reader (the best web service EVER) to scan over 100 food blogs on a daily basis. This list includes tastespotting.com which compiles beautiful photos of food from across both the web and the world. Despite the plethora of sources of inspiration, I have been coming up empty handed.

I am unimpressed with the multitude of cheesecake pops that have been plastered throughout the blog world recently. Dont get me wrong, they look wonderful, but I am not entirely certain why 45 people are all making the same thing. I get that its a club bu
t it makes the web monotonous and, lets face it, the food blogs all exist to please me.

Recipes also have become more complicated. It seems the days of wowing people with out of this world chocolate cupcakes have gone the way of railroad transportation. Now they are all cream filled or decorated to the hilt and inevitably require a list of over 30 ingredients. Even brownies appear to involve single origin cocoa powder and other specialty items that run up the price of the tasty treat. I never thought I would say this, but perhaps I am not "bougie" enough for this new food world that is emerging.

What ever happened to making simple recipes that highlight the pure flavors of quality ingredients? I recently made a coconut cake to bring to a friends BBQ. The dinner menu was kind of Cuban with fried plantains, seasoned black beans, and some of the best barbecued pork I have had in quite a while. I decided to go along with the tropical theme and began researching recipes on the web. I was disappointed to see that most recipes called for sweetened dessicated coconut, an ingredient that I feel doesnt represent the natural flavors of coconut at all.

Most recipes also included sweetened cream of coconut. A few years back after returning from Puerto Rico I was in love with pina coladas and searched for drink recipes. The majority of the concoctions also called for this sweetened cream of coconut but when I looked at the ingredient list I found that they didnt actually include any real coconut! Why should I use fake coconut to flavor my cake? What would flavored corn syrup add to my dessert?

I decided to change up the recipe a bit and substituted real fre
sh coconut for the dessicated version and used coconut milk in the cake instead of the sweetened cream of coconut. The result was a cake that highlighted the floral quality of fresh coconut and that had no need to mask simulated coconut flavor with an immense amount of sugar . Due to the use of coconut milk, the cake was not as fluffy as the original version and in the future I may use low-fat coconut milk to combat the increased cake density. While this cake involves more steps than I usually utilize, the ingredient list is relatively short and draws attention to the star ingredient, coconut.

I used some of the tangerines I had laying around to make a tangerine curd to fill the cake with. The fresh tangerine complemented the coconut flavor without overpowering it. The curd was also wonderful as a topping for my toast. The tangerine curd is on the first piece of toast in the following photo (also pictured is Archer Farms brand California Apricot Jam and Trader Joes brand Citron Honey).


Coconut Cake

Cake
2 3/4 cups all purpo se flour
1 teaspoon baking powder
1/2 teaspoon baking soda
1/2 teaspoon salt
1 3/4 cups sugar
1 cup (2 sticks) unsalted butter, room temperature
1 cup canned sweetened cream of coconut (such as C oco Lépez)*
4 large eggs, separated
1 teaspoon vanilla
extract
1 cup buttermilk
Pinch of salt
Preheat oven to 350°F. Butter and flour two 9-inch-diameter cake pans with 2-inch-high sides.

Combine flour, baking powder, baking soda and 1/2 teaspoon salt in medium bowl.

Beat together sugar, butter, and coconut milk in large bowl until fluffy.

Beat in egg yolks and vanilla extract.

Add the dry ingredients incrementally until fully com bined and then add buttermilk and beat until just incorporated.

Using clean dry beaters, beat egg whites with pinch of salt in another large bowl until stiff but not dry.

Fold the egg whites into the cake batter.

Divide cake batter b etween prepared pans. Bake cakes until tester inserted into center comes out clean, about 45 m inutes. Cool cakes in pans on rack 10 minutes. Run small sharp knife around pan sides to loosen cakes. T urn cakes out onto racks and cool completely.

Tangerine Curd F illing
3 large eggs
3 large egg yolks
1/2 cup sugar
1/2 cup fresh tangerine juice
1/4 cup tangerine zest
Pinch of salt
6 tablespoons (3/4 stick) unsalted butter, cut into pieces, room temperature

Whisk eggs, yolks, sugar, lime juice, lime peel, ginger, and salt in large metal bowl to blend.

Place bowl over saucepan of barely simmering wat

er. Whisk constantly until curd thickens, 12-15 minutes. The curd will thicken as it cools but should be thick enough at this stage to hold the lines of the whisk.

Remove bowl from over simmering water; whisk butter into curd.

Strain through fine strainer set over bowl; discard solids in strainer. Press plastic wrap directly onto surface of curd; chill overnight.

Frosting and Cake Toppings
I used a butter cream frosting and added a bit of coconut milk to the mix for flavor.
I also grated fresh coconut to place of top of the cake and surrounded the cake with larger chunks of coconut flesh.


Thursday, March 20, 2008

My Perfect Chocolate Chip Cookie Recipe

I finally have about 15 minutes free between adding material to my thesis and going to bed and I figured I would spend them by posting my favorite chocolate chip cookie recipe. In the title I stated that they were my perfect chocolate chip cookie recipe because everyone has different criteria for what makes a good chocolate chip cookie. My favorite ones are chewy, maybe even a little cakey. They also tend to be flavored by lots of dark brown sugar rather than the white stuff (though its still in the recipe). And, I dont use milk chocolate chips which I think makes the cookies too sweet. I was out of bittersweet chocolate chips during this episode of me playing Betty Crocker so I cut two bars of high quality dark chocolate into cubes and tossed those in the mix instead.

The particular recipe I have been using forever is labeled the "Mrs. Field's" recipe, but I have no recollection of why that might be. Mom, any idea? Anyways, the recipe make like a bazillion cookies and I always end up halving it and still having to give some away. This time, like I did with the peanut butter cookies, I divided the dough and froze half of it. As you look over the recipe you will see that for logistical reasons, you really need a good standing mixer to combine the ingredients. I should note that when I didnt have a mixer, I made the half recipe by hand, so it is possible. The event also gave me a blister though so be careful!


My Perfect Chocolate Chip Cookies
(aka: Mrs. Field's Cookie Recipe)

1 lb butter
2 c. dark brown sugar
1 1/2 c. white sugar
2 T. vanilla extract
3 large eggs
6 c. flour
1 1/2 t. baking soda
1 1/2 t. salt
2 12oz packages of chocolate chips
2 c. nuts (optional)


Preheat oven to 350*

Cream together the butter and both sugars.

Add the vanilla extract and add one egg at a time, beating well in between. Once all eggs have been added, beat the mixture for 4 minutes on medium-high.

Add the baking soda and salt to the well-beaten mixture and start adding the flour slowly (reduce the speed of the mixer).

Add your chocolate chips and nuts at this point and stir until just combined.

Place tablespoon sized portion of dough onto your silpat and bake for 10-15 minutes depending on how crispy you want your cookies.


*if you like crispy cookies you can reduce the heat to 250 and bake them for 18-25 minutes.

Monday, March 17, 2008

The Perfect Peanut Butter Cookie

I went up to Chicago last week to conduct some research at the Field Museum of Natural History. I managed to find someone to stay with so I didnt have to pay for a hotel in the big city. I left early Monday morning and Sunday night I was wondering what thank you gift I should bring to my gracious host. They dont sell booze on Sundays here in Indiana. Its a crazy law that makes me curse god more than revel in his wonder. Anyways, I figured the next best thing to bring a bachelor was homemade goods so I whipped up some peanut butter cookies (and some chocolate chip ones but those are for another posting).

I made the recipe and divided the ball of dough in two equal parts and put half of it in the freezer so I could have cheater cookies at a moments notice. I still had too many to fit into the one large tupperware I was going to bring my host, so I stuck some in a throw away tupperware and saved them for my Dad who was going to meet me in Chicago later that week (they were in a freezing trunk and stayed surprisingly fresh). He declared that they were a perfect texture: crunchy on the outside but chewy in the middle. I have to agree, they were pretty damned good! Oh, if anyone knows why they have to have the little grid pattern on them please drop me a line...

Old Fashioned Peanut Butter Cookies

3 c. flour
1 t. baking powder
1/2 t. salt
1 c. butter
1 1/2 c. peanut butter
1 T. vanilla extract
1 c. brown sugar
1 c. sugar
2 large eggs


Preheat the oven to 350.

Beat together butter, peanut butter, and vanilla.

Beat in both types of sugar, the salt, and the baking powder.

Add flour a little at a time.

Add one egg at a time.

Roll the dough into 1 1/2 inch balls. Place 2 inches apart on your favorite silpat-type sheet liner. Using a fork make a grid pattern by flattening the cookie.

Bake for 14 minutes

Wednesday, February 20, 2008

Theme Pear Continues

It seems pears are one of the fruits the purchasers of supermarket produce have decided to stock this winter in Lafayette. Though I cant complain (I would love to see some Meyer Lemons in the bins), I seem to be posting similar types of recipes: pretty little things made out of baked pear slices. They all are easy and quite tasty, which is why I continue to post about them.

This particular recipe I got from the new cookbook I purchased on Saturday. The recipes are quick and each displays the time it takes to prep and the total time it takes to cook. The style of the food is similar to how I cook anyways but the seasonal recipes give me ideas of what I can throw together in no time at all. This dish is listed as a dessert suggestion in the Fall season section. Basically I was hungry and thought it sounded like a great breakfast idea. This recipe is my third great breakfast in a row this week and was simple to assemble (though it took 40 minutes in the oven). I didnt even change anything about the recipe though I may play with it a bit when I make it again. Personally, I think it would be divine with fresh peaches!

Though the real name of the recipe is Pear Custard Pie, I really think it is more of a Baked Pear Custard since it has no crust, so thats what I am calling it!

Baked Pear Custard

1/4 c. melted butter
2 ripe but firm pears
1/3 c. sugar
1/3 c. flour
2 t. vanilla extract
3 large eggs
3/4 c. milk
1/4 t. salt

Preheat the oven to 350. Butter a 9 inch pie pan.

Now really, butter the nine inch pie pan.*

Peel, core, and slice the pears into 1/4 inch thick slices. I cut them down the length of the pear but I think it might be easier and just as pretty to slice them across their width. Arrange the pears in the buttered pie dish.

In a blender, food processor, or by hand combine the rest of the ingredients until they are smooth.

Pour the filling over the pears and bake for 40-45 minutes or until the top is browning.

The original recipe suggests you serve it warm but I think it needs to sit for a few minutes so that it holds its shape a little better. It is a jiggly mess when it first comes out of the oven.

The custard can be sliced but doesnt hold its shape very well so I recommend serving it in a bowl. If you are using this as a dessert, I think a scoop of ice cream and some powdered sugar would make the perfect finishing touches.

The recipe says that it takes 15 minutes to assemble, but I would put it closer to 5 or 10.

*I say this because I failed to read this step and I am currently soaking the pie pan in the sink.


Saturday, February 2, 2008

Pear and Hazelnut Frangipane Tart

When I began this blog I stated that a certain theme would appear frequently in the posts: Appearance and Reality.

This is one such post.
I was invited to dinner and K & D's house on Friday for some homemade miso soup and sushi. Admittedly, I was a bit dubious of homemade sushi in a land-locked state like Indiana. It turns out that I had nothing to worry about. Both the soup and sushi were wonderful! K & D had prepared a wide array of items to include in the rolls and we each got to design a few ourselves. I had two particular favorites: 1) a seaweed-less roll filled with eel, cucumber, tempura-ed green onion, and avocado, and 2) a seaweed wrapped smoked salmon and cream cheese roll. I was definitely a fan and there was a general consensus that we should do something similar again soon.

I was charged with bringing dessert. It was a lucky assignment since I had the perfect dish to make using the hazelnuts I had purchased at the end of fall: Pear and Hazelnut Frangipane Tart. This is one of those dishes that looks like a million bucks. It appears as though the baker has superhuman skills in the kitchen when in reality the ingredients do all the work.
Pear and Hazelnut Frangipane Tart

3 firm bosc pears (selected for shape)
1 c. toasted hazelnuts

2 eggs

6 T. butter

1/2 c. sugar

1/4 c flour

1 t. vanilla extract*

1/2 t. almond extract

3 T. apricot preserves

1 tart shell


special items: 11 inch tart pan

Preheat oven to 350.

Bake the tart shell according to directions. Set aside to cool.

In a food processor pulse hazelnuts with 1/4 cup sugar until coarsely ground. Add 1/4 cup flour and pulse until mixture is finely ground.


In an electric mixer beat butter and remaining sugar until light and fluffy. Add one egg at a time, combining well. Add extracts. When egg mixture is smooth, add the ground nuts until just combined.
Pour the mixture into the tart shell and spread evenly.

Peel, halve, and core the pears. Slice the pears into 1/4 inch slices and arrange decoratively atop the hazelnut mixture and place in the oven for 30-40 minutes or until pears and frangipane are browned.


When you remove the tart from the oven, coat the pear with melted apricot preserves.
Remove the tart from the pan and appear as though you are master in the kitchen!
*This was the first time I used my homemade vanilla extract. I have to say the vanilla flavor is wonderful!

Monday, January 28, 2008

Pistachio Saffron Cakes

I would have to say that one of the main pet peeves I have with regards to food bloggers is that they provide a picture of a beautiful cake they made without giving the reader a glimpse of the inside. Obviously flavor is essential in a good cake, but I would have to argue that texture follows closely behind. A cake with great chocolate flavor but that is crumbly and dry is still a bust.

I want to see the insides, people! Its not too much to ask. I know that every now and again you cant take a photo of the innards because either the cake is being given to someone or perhaps the cake was devoured before proper pics could be taken. Its like the saying about judging a book by its cover.

The cover may entice you but the writing inside has to hold your interest. With that being said I present you with two photographs and you can tell me which most compels you to make the following cake. Leave me a comment with your opinion...

Photo 1: Outside of cake


Photo 2: Inside of cake


Pistachio Saffron Cakes

3 T warm milk
1/2 t saffron
3 large eggs
1/2 t vanilla extract
2/3 c flour
1/2 c sugar
3/4 t baking powder
1/4 t salt
3/4 c butter
1/4 c pistachios chopped

Preheat oven to 350

Soak the saffron strands in warm milk for about 10 minutes to draw out flavor and color.

Combine all dry ingredients and add cubed butter. Beat.

Add the eggs one at a time and beat to combine. Add vanilla.

Add the milk and saffron then add the pistachios.

Bake for 25-30 minutes or until the tops are golden brown.

Makes 12 mini-cakes.

I suggest using a pastry bag or plastic baggy to neatly deposit the batter into the mini cake pans. I found the batter difficult to navigate into the tiny dishes and the ghetto pastry bag really helped make the process neater.

Sunday, November 4, 2007

Thrice Thwarted by Tapioca


Its been getting cooler here in the mid-west and that has put me in the mood for custardy foods. I was in the baking section of the grocery store the other day picking up vanilla beans for Jaden's Vanilla Bean Giveaway and spotted the tapioca from across the isle. I opted for the large pearls since I always feel like I never get enough of the squishy bits in my tapioca.


I got home. I was *so* excited; I was going to have tapioca for dessert. WRONG! The damned things had to soak in water over night. Who was it that talked me into getting the freaking large pearls?!? (Initial thwart) Ok, so I had to use patience... I checked those damned pearls every hour on the hour just in case they were ready at any point before bed.


The next morning, I did the whole bit: warmed the cream, separated the eggs, beat in the sugar, scraped out the vanilla bean caviar (added the leftover bean to some vodka for homemade vanilla extract), and whipped up the egg whites til they were stiff - by hand. I was following the directions to a 'T' and everything was going beautifully. I folded in the egg whites to the "hot tapioca mixture." Needless to say my tapioca is a little curdled. :( My mom informed me that I was supposed to wait until the mixture cooled to fold in the egg whites so I guess the directions were wrong. (Twice thwarted)

Thankfully it is still mostly pretty and, more importantly, tastes heavenly. Since I am eating it all myself and not feeding it to company, I can look beyond its mottled appearance. The pearls were perfect balls of tapioca and were completely soaked and cooked through and their texture was wonderful. I was generally content (at least with my tapioca).

Its day two of the tapioca and I am kind of confused. The perfect tapioca pearls from yesterday had developed hard centers overnight! They arent crunchy as they had originally started out, but they are decidedly less gelatinous. (Thrice thwarted) I am not certain what is going on with it. It still tastes good so I am continuing to eat it, but now it definitely needs to be chewed which is just weird. I guess big balls just arent worth the trouble. hardee-har-har? oookmaybenot

Also, just in case you were wondering, you shouldnt freeze tapioca. I stuck a tester size in the freezer thinking that it might just happen to be the best thing ever. It was gummy and doesnt rank high on my list of frozen delights. (Thwarted for a fourth time?)

Thursday, October 25, 2007

Coconut Dofu

Yes, I am on a coconut kick.

I made Dofu a while ago but had some problems with the color of the jello-like substance. The bottom layer was clear while the top layer was white. The whole thing is supposed to be white without any kind of gradient. Apparently the cream I had mixed in didnt adhere to the gelatin.


This time I had half a can of coconut milk in my fridge and decided that a coconut and almond flavored dessert was just what I needed! The coconut milk worked much better than the cream. The white color was consistent throughout my dessert and went perfectly with the tropical fruit that I topped the Dofu with.

This dish is sweet without being over powering and the fruit makes it a little healthy even. I find it a nice change to heavier dessert options.

Sunday, October 14, 2007

Shortbread Cookies with Lavender and Rosemary

If you have read more than one of my prior posts, you should be well aware that I am big on the whole notion of appearances versus reality. For example, my car, though certainly not cheap looks at least 10K more pricey than it really is. Recipes provide a decidedly cheaper and more frequent avenue to explore my love for the seemingly rich and extravagant.

Today, I made a distinctly snooty cookie simply by adding lavender and rosemary. I also took half the cookie dough and froze it so I could whip some up should I have a reason to play Betty Crocker at the last minute.

These cookies turned out flavorful without being overpowering, as I feared they might be. Granted, the amount of butter in and of itself makes them tasty but the texture is delicate and as you can see the presentation is b
reathtaking (if I dont say so myself).

Shortbread Cookies with Lavender and Rosemary

Recipe courtesy of The Pastry Project

3 sticks unsalted butter
2/3 cup sugar

1 T. chopped fresh rosemary

1 T cooking lavender

2 3/4 cups flour
1/4 t. salt


Beat the butter and sugar together until fluffy.
Add flour, salt, and herbs.
Chill the dough for an hour.

In a perfect world*, roll out the dough to a 1/4 of a inch.

Cut out the cookies
and place on a greased cookie sheet.
Bake the cookies at 375 for 8-10 minutes.
They should be ever so slightly browned.

Voila! Fancy-schmancy!!


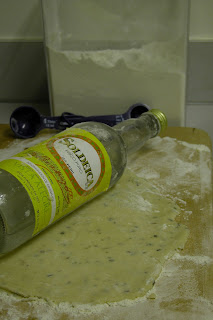
*In my case the dough was extremely soft and hard to roll out. I froze the dough but the dough then cracked and once it was workable it was too soft again. I finally broke out my silpat and rolled the dough out, used a cookie cutter to make the shapes, and then flipped the entire thing over in an attempt to pry the cookies of the mat. For all the trouble, they are worth it. Truly!

Monday, September 24, 2007

To Roast or Not to Roast?

The following recipes and pictures are for the same pasta dish; the difference is in the technique. To roast or not to roast that is the question.


Grape Tomato Pasta with Goat Cheese, Basil, and Garlic

1 pint Grape Tomatoes
Garlic cloves
1/3 Basil
Olive Oil
Fennel Seeds
Salt
Pepper
*Ok, so i threw some broccoli in there too once...

The Roasted Version:
Obviously roasting brings out a smoky favor in the tomatoes and caramelizes the sugars. Roasting also cuts the acidity and sharpness of garlic, making the flavor more mellow.


The Sauted Version:
On the other hand, if you were to saute the tomatoes the sugars in the tomatoes are heightened without sacrificing the fresh flavor, plus you still get that burst of juice when the tomato pops in your mouth. The pasta ends up tasting more like salsa I think.

Sunday, September 16, 2007

A Two Course Meal - Bison Bones and Inka Imperialism

Although I was ultra-busy this week, I still managed to eat well (so I am not certain why it is that I am getting sick). The highlight of the week was most likely the Thai Basil Chicken with Coconut Rice and the Dofu topped with Tropical Fruit.

I am still obsessed with the coconut rice and will probably continue to be until I am big as a house. :) I also love the fact that I can make something that is so full of flavor and that literally takes 15 minutes total.

Thai Basil Chicken with Coconut Rice
(Yes, strangely this seems very similar to the Thai Mint Pork...its all in the technique.)


1/2 lb ground chicken
2 T. fish sauce
2 T. rice vinegar
2 T. brown sugar
3 green onions - sliced
2 gloves of garlic
1/3 c. of basil leaves
bamboo shoots
chili pepper oil to taste

1 c. rice
1 c. coconut milk
1/2 c. water


Add the rice, coconut milk, and water to the rice cooker and turn it to cook.


Quickly saute the green onions and garlic in about 1 T of oil.
Add the brown sugar, fish sauce, and rice vinegar, and chili. Stir to combine.
Add the chicken. When mostly cooked through add the bamboo shoots.
Turn off the heat and stir in the basil.
Serve the chicken and sauce over the coconut rice.


The Dofu is really just from a package that I found at the local asian store. Dpfu is the almond flavored gelatin desert you get at some Chinese restaurants. Typically it is topped with cheap fruit cocktail. I decided to up the anti and put the tropical fruit cocktail on instead. It wasnt as sweet because the fruit wasnt sitting in heavy syrup, but passion fruit juice. It also turned out a lot prettier than some tired grapes and peach bits.

I wont insult you with including instructions here since you should follow whatever your box says, just remember to try topping it with something refreshing and beautiful. I am sure you could make your own fruit topping that would work even better.

Wednesday, September 12, 2007

Plum Galettes


"Seize the day!" I thought to myself as I strolled down the short block that is
my farmers market. Instead of my typical 2 pints of grape tomatoes, 4 asian pears, 1 carton of rasberries, and 1 gigantic bunch of basil, I also opted for some plums. They looked really ripe, but not yet squishy, and they were calling out for me to wrap them in pastry dough. Luckily, I know how to make pastry dough! While I had never actually cooked a plum before, like ever, I was up for the challenge, especially if it meant I got to take a break from writing my NSF grant.


Anyways, six plums later I was wrist-deep in purple juice. I followed a single pie crust recipe and shaped them by hand (because I dont have a rolling pin) into 4 little rounds and placed them on my silicon mat. I then coated what would be the fruit bottom of the galette with a thin layer of sugar and flour. "They" tell me that it is supposed to keep the bottom from getting goopey and, indeed, my bottom wasnt goopey so it must work!

Instead of doing something interesting to the pie crust I decided to add a little tangerine zest to the plum slices. I arranged the slices in as much of a pinwheel as I could manage and folded the pie crust over the edges of the plums in a somewhat "rustic" fashion.

I popped them in the oven topped with foil at 375 for 35 minutes. At that point I removed the foil and allowed the full heat of the oven to hit the galettes for another 5.

When they came out they really were prettier than the pictures let on. I even had one for dinner in a pseudo hat-tip to Bill Cosby who thought that chocolate cake made good breakfas
t since it included eggs and milk. I have to say that adding tangerine zest to the plums was freaking genius! Maybe they will give me an NSF award for that...